Creating a Custom Counter Hook in React: Increment, Decrement and Reset Values

Introduction
The Custom Counter Hook is a simple yet powerful React hook that allows you to quickly and easily create counters with increment, decrement, and reset functionality. The hook provides an interface for creating counters with various options, including changing the initial value, setting an upper and lower limit, and more.
This article will cover the basics of creating custom counter hooks with React,a 404 page, error boundary and SEO.
The Task
Set up a custom counter hook with increment, decrement, reset, setValue functions with a valid UI and implement a combination of states with a useReducer that implements a counter with the four evident features in the custom hook- increment, decrement, reset, setValue. Implement a page for the custom hook, useReducer, 404, and a page to test error boundary and good SEO.
Before you begin, you should be familiar with the basics of React Hooks and how to create custom hooks.
To-do's
1. Create React app
npx create-react-app Counter-app
To get started, create a new file in your React project and call it useCounter.js ,I named mine customHook.js. This will be the file where we'll create our custom hook.
2. Install dependencies
npm i react-router-dom
3. Setting up React Router
 <Router>
      <nav>
        <div>
          <ul className="navbar">
            <li className="nav-links">
        <Link to="/">CustomHook</Link>
        <Link to="/reducer">Reducer</Link>
        <Link to="/testPage">TestPage</Link>
            </li>
          </ul>
        </div>
     </nav>

      <div>
        <Routes>
          <Route path="/" element={<CustomHook />}></Route>
          <Route path="reducer" element={<Reducer />}></Route>
          <Route path="*" element={<PageNotFound />}></Route>
          <Route path="testPage" element={<TestPage />}></Route>
        </Routes>
      </div>
    </Router>
4. Implementation- customHook
First, we will import the useState hook from React. This will allow us to keep track of our count in our custom hook.
Next, we will create our useCounter hook. This hook will take in an initial count as an argument and return an array containing our count and two functions that can be used to increment or decrement the count.
import React, { useState } from "react";
function CustomHook() {
  const [value, setValue] = useState(0);

  const handleIncrement = () => {
    setValue((count) => count + 1);
  };

  const handleReset = () => {
    setValue(0);
  };

  const handleDecrement = () => {
    setValue((count) => count - 1);
  };
 return (
    <>
        <button className="increase" onClick={handleIncrement}>
            Increment
          </button>
          <button className="reset" onClick={handleReset}>
            Reset
          </button>
          <button className="decrease" onClick={handleDecrement}>
            Decrement
          </button>
    </>
  );
}
export default CustomHook;
5. Implementation- useReducer
useReducer is a React hook that allows you to manage state in a simple and consistent way.
How to Use useReducer: Using useReducer is fairly straightforward. All you need to do is define a reducer function, define an initial state, and then pass both of these to the useReducer hook. Let’s look at how I used useReducer to increment, decrement, and reset a counter value.
First, we’ll define our initial state and the reducer function:
import { useReducer } from 'react';

function countReducer(initialState = 0, action) {
  switch (action) {
    case 'increment':
      return initialState + 1;
    case 'decrement':
      return initialState - 1;
    case 'reset':
      return 0;
    default:
      return initialState;
  }
}
function Reducer() {
  const [value, setValue] = useReducer(countReducer, 0);

  return (
    <>
    <div className="box">
      <h1 className='reducer-head'>Reducer</h1>
      <span className="output">{value}</span>
      <div className="card">
        <button className="add" onClick={() => setValue('increment')}>add</button>
        <button className="reset" onClick={() => setValue('reset')}>Reset</button>
        <button className="subtract" onClick={() => setValue('decrement')}>subtract</button>
      </div>
    </div>
    </>
  );
}

export default Reducer;
5. Setting up Error Boundary Component
Error boundaries are components that catch JavaScript errors anywhere in their child component tree, log those errors, and display a fallback UI instead of the component tree that crashed. Example code for errorBoundary:
import React from "react";

class ErrorBoundary extends React.Component {
  constructor(props) {
    super(props);
    this.state = { hasError: false };
  }

  static getDerivedStateFromError(error) {
    // Update state so the next render will show the fallback UI.
    return { hasError: true };
  }

  render() {
    if (this.state.hasError) {
      // You can render any custom fallback UI
      return (
        <h1 className="wrong">
          Something went wrong!! <a href="/">return home</a>
        </h1>
      );
    }

    return this.props.children;
  }
}

export default ErrorBoundary;
6. Creating a 404 page
The 404 page is a page on a website that is displayed when the server cannot find a page the user has requested. Example code for a 404 page:
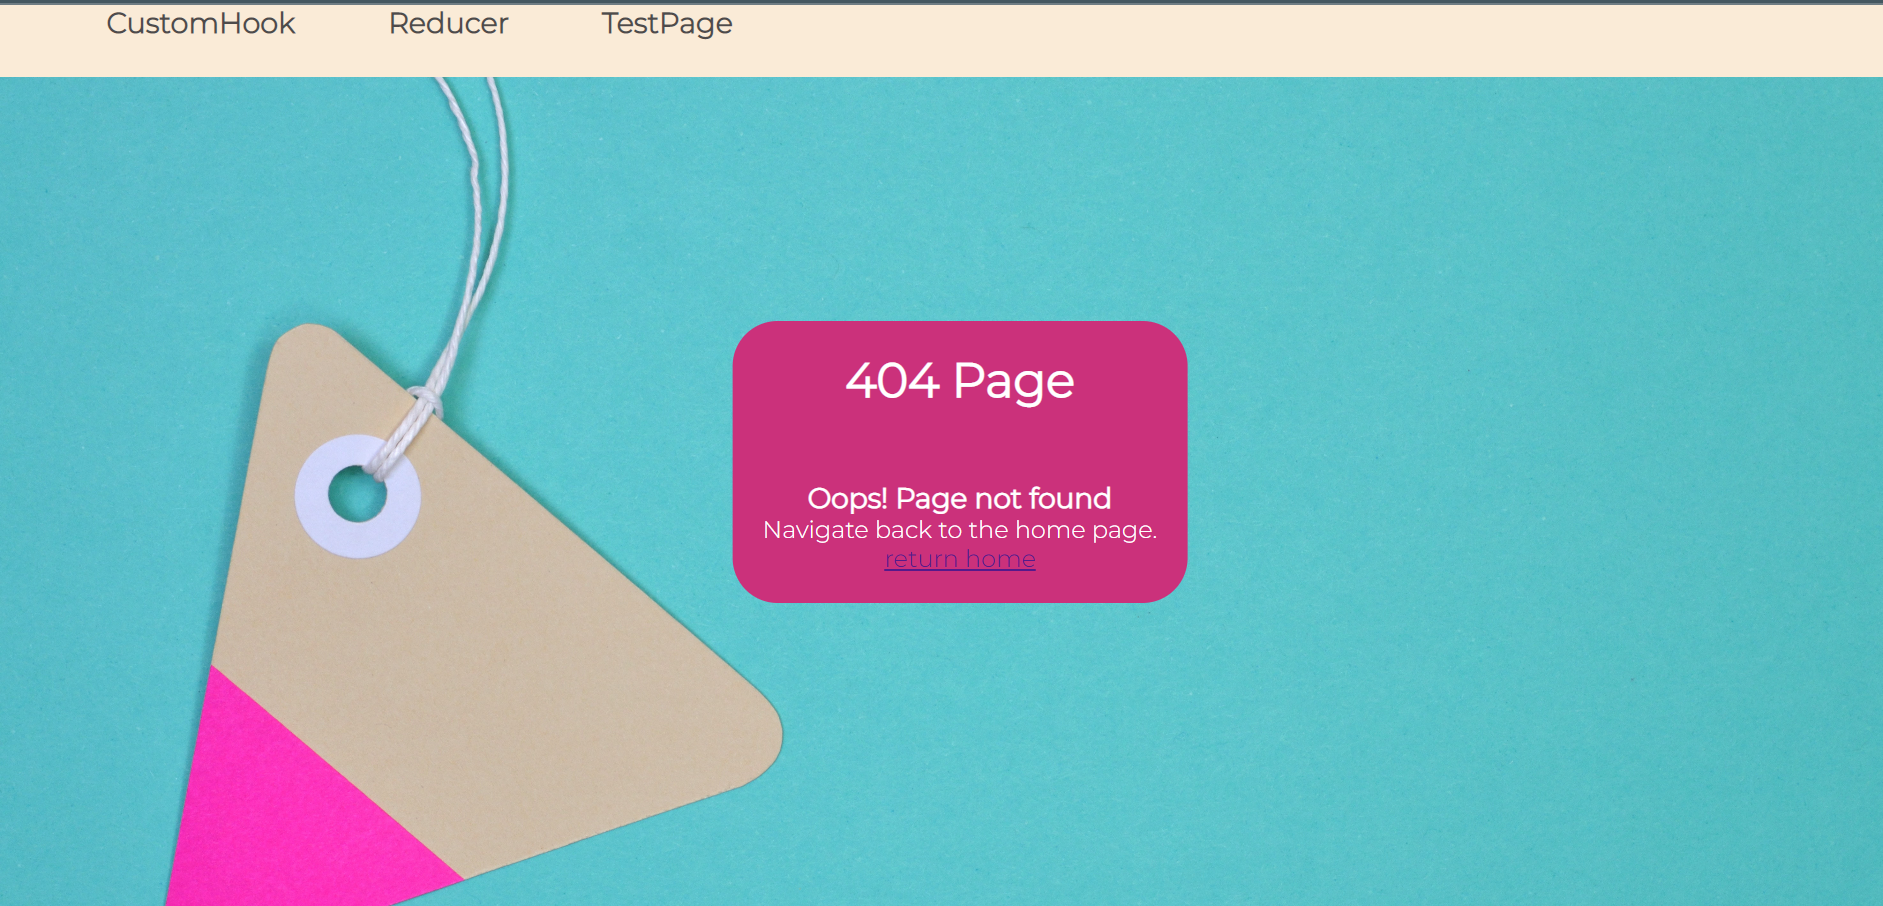
Bonus tips: keep your 404 page simple and easy to understand, use a friendly tone, and include a link to your home page or other useful pages.
7. Implementation of SEO
SEO is an important factor for any website since it helps to increase visibility in search engine results and drive more traffic to the site. SEO helps to improve the user experience of a website by making it easier to find relevant information and making the website more accessible.
The first step is to install the library called React Helmet.
npm i react-helmet-async
Once React Helmet is installed, import a <HelmetProvider> component from react-helmet-async which is used to wrap the application's root component. Then add data-rh="true" to the index.html in the meta tag. Then configure the helmet component on each page (title, meta and link tags). FInally, check with meta SEO chrome extension.
Conclusion
This project which was my exam project encompasses the fundamentals in React and is a must know for every frontend developer. I hope it's been an interesting read for you.
You can check out the live site of my counter app. Also, check the github repo to the application.
Thanks for reading.

